

| Aperture Ring |  This ring controls the aperture size (f-stop). The higher the f-number, the smaller the aperture is and the less light can enter the camera. Also, a smaller aperture (High f-number) has a greater depth of field than a lower one. More About Apertures |
| Film Advance Lever | 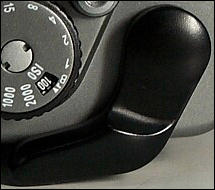 The Film Advance Lever, present on most fully manual cameras, advances the film to the next frame. Pulling the lever out all the way to the right moves the film into position for the next picture. This must be done after each time that the shutter button is pressed. |
| Focal Length Indicator | 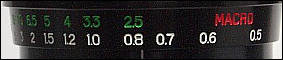 Many cameras have a focal length indicator. This tells the user at what distance the camera is focusing. For example, if you want to focus on a flower that is 3ft in front of you, you could turn the focus ring until the indicator says 3ft to focus the camera. The picture displays a lens that is focused on a subject about 2.5ft (0.8m) away from the camera. |
| Focus Ring |  The focus ring controls focusing on manual SLRs. While looking through the viewfinder, turn the focus ring until your subject is crisp and clear to focus the camera. More About Focusing |
| Hot Shoe |  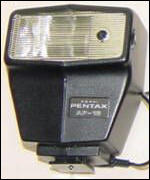 The hot shoe is a bracket that can hold an external flash, such as the one shown above, or some other external accessory. More About Flashes |
| Lens Removal Button |  |
| Rewind Lever | 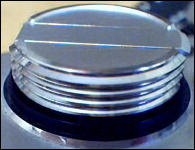  Once the entire roll of film has been exposed, lift this lever up and rotate it clockwise many times until the film has been rewound back into its canister. It should be done once the tension feels reduced after several turns. Just in case, turn it several more times to ensure that the film is in the canister. Note that on some cameras you must press a small button or turn a switch (Usually labeled "R") before rewinding. Consult your camera's manual for more detailed instructions. Also, many newer models automatically rewind at the end of the roll, in which case the rewind lever is not present. |
| Shutter Button | 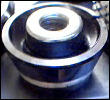 This is the button that you press to take a picture. Push it all the way down to take a picture. Many cameras have a threaded hole in the shutter button, as in the picture above. This allows you to screw in a device to activate the shutter by remote control. Note that on a few newer models the shutter button can be pushed half way down or all the way down. On these cameras, pushing the button halfway down may activate the light meter, or trigger a red eye reduction lamp to light. Consult your manual for more information. More About the Shutter |
| Shutter Speed Dial | 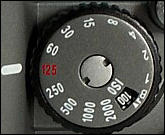 This dial, present on most manual cameras, allows the user to tell the camera the speed of the currently loaded film. More About Shutter Speeds |
| Viewfinder |  The view through the viewfinder of an SLR is exactly what will come out in the picture - if the light level is right. One typical type of viewfinder, like the one in the picture, is a split image viewfinder. If your camera has a circle with a horizontal line through it, then simply point the center of the circle at your subject and turn the focus ring until the two halves of the circle come together (It is easiest to see this when pointing the camera at a subject with a vertical line, such as the edge of a building). Once the two images are perfectly aligned, the subject is in focus. If this feature is not present, then you must instead turn the focus ring until your subject is crisp and clear. Most SLRs have a light meter in the viewfinder, like the one on the right in the picture. The light meter tells you if the picture is too light or too dark. More About the Viewfinder |